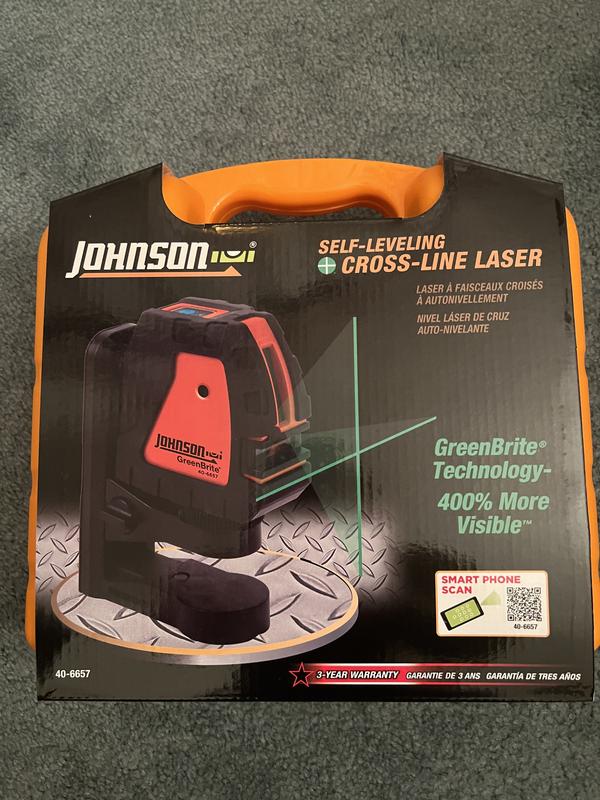
Johnson GreenBrite Laser Level: A Guide to Features, Uses, and Buying Tips
A Johnson GreenBrite laser level is designed to make common layout and alignment tasks easier by projecting visible laser lines onto a work surface. Green-beam models can be especially useful indoors, where the line may be easier to see than a comparable red beam in bright conditions. Exact features vary by model, so check the product specifications before choosing a level for a particular job.
What Is a Johnson GreenBrite Laser Level?
Johnson Level & Tool offers laser levels under its GreenBrite name. These tools are used to establish level, plumb, or aligned reference lines for construction, renovation, installation, and home-improvement projects. Depending on the model, a GreenBrite level may project one or more lines and may include features such as self-leveling, a manual mode, or a mounting accessory.
Why Choose a Green Laser?
Green laser lines are often easier to see than red lines in indoor spaces, particularly in well-lit rooms. Visibility still depends on factors such as ambient light, distance, surface color, and the strength of the laser. A green beam is not automatically suitable for every outdoor task; for work in bright sunlight, a compatible detector or receiver may be needed. Confirm that the specific level supports one before purchasing.
Common Applications
A GreenBrite laser level can help with tasks such as:
- Hanging cabinets, shelves, artwork, or wall décor in a straight line
- Aligning tile, trim, or wall features
- Checking level and plumb during remodeling or installation work
- Setting reference lines for framing and other layout tasks
- Coordinating multiple points or surfaces, when supported by the model
Features to Check Before You Buy
GreenBrite products can differ in their capabilities. Before choosing a model, review the manufacturer’s specifications for:
- Laser layout: Check whether the level projects a horizontal line, a vertical line, multiple lines, or another pattern.
- Self-leveling range: If the model self-levels, confirm its operating range and how it indicates that it is out of level.
- Working range and accuracy: These determine how far the laser can be used and how closely it maintains the reference line.
- Detector compatibility: A receiver may extend usability in bright environments, but compatibility is model-specific.
- Power and runtime: Check the battery type, whether batteries are included, and the stated operating time.
- Mounting options: Consider whether the level fits a tripod or includes a bracket suited to your work surface.
- Included accessories: Cases, targets, mounts, and other items vary by package.
Tips for Getting Accurate Results
Set the laser level on a stable surface or secure it using a compatible mount. Allow a self-leveling model to settle before taking measurements, and make sure it is within its specified leveling range. Keep the lens clean, avoid moving the tool while marking reference points, and follow the manual’s instructions for calibration checks and care.
Laser safety matters, too. Never look directly into the beam or aim it at another person’s eyes. Use the tool according to its safety labeling and manufacturer instructions.
Is a Johnson GreenBrite Laser Level Right for You?
A Johnson GreenBrite laser level may be a practical choice for homeowners, installers, and contractors who want visible reference lines for alignment and layout. The best model depends on the work: a simple indoor project may call for fewer features, while larger jobs may require a longer working range, additional line patterns, or detector compatibility.
Compare the specifications for the exact Johnson GreenBrite model you are considering rather than relying on the product family name alone. Choosing the right features—and using the level on a stable setup—can help make measuring and layout work faster and more consistent.
9 Tips for Using Your Johnson GreenBrite Laser Level Safely and Accurately
- Read the manual before first use.
- Set the level on a stable surface or tripod.
- Use the self-leveling mode on a level setup.
- Lock the pendulum before transporting the tool.
- Choose pulse mode when using a compatible detector outdoors.
- Wear laser safety glasses if recommended by the manual.
- Avoid staring into the laser beam.
- Check calibration regularly, especially after a drop.
- Store the level in its protective case.
Read the manual before first use.
Before using a Johnson GreenBrite laser level for the first time, read the manual to learn how to set it up, operate its features, and care for it properly. The instructions explain model-specific details such as self-leveling, mounting, battery use, accuracy checks, and laser safety. Taking a few minutes to review them can help you avoid setup mistakes and get reliable results.
Set the level on a stable surface or tripod.
For accurate results with a Johnson GreenBrite laser level, place it on a stable, level surface or secure it to a compatible tripod before use. A steady setup helps prevent unwanted movement that can shift the laser line and throw off your measurements. Once positioned, let the level settle and, if it has a self-leveling feature, wait for it to finish leveling before marking your reference points.
Use the self-leveling mode on a level setup.
For accurate results with a Johnson GreenBrite laser level, place the tool on a stable, roughly level surface before using its self-leveling mode. The self-leveling mechanism can compensate only within the model’s specified range, so a setup that is too tilted may prevent the laser from leveling correctly. Wait for the laser line to settle, and check the manual or indicator lights to confirm the level is ready before marking your reference points.
Lock the pendulum before transporting the tool.
Before transporting your Johnson GreenBrite laser level, lock the pendulum if your model has a pendulum-lock feature. This helps protect the internal self-leveling mechanism from unnecessary movement and impacts while the tool is being carried or stored. Follow the model’s instructions for engaging the lock, and place the level in its case when available.
Choose pulse mode when using a compatible detector outdoors.
When using a compatible detector outdoors, choose pulse mode on your Johnson GreenBrite laser level. Pulse mode helps the detector pick up the laser signal in bright conditions, where the beam may be difficult to see. Check your model’s manual to confirm detector compatibility and follow the manufacturer’s setup instructions.
Wear laser safety glasses if recommended by the manual.
Wear laser safety glasses if the Johnson GreenBrite laser level’s manual recommends them, and make sure they’re designed for the laser’s specific wavelength. Safety glasses are an added precaution—not a reason to look directly into the beam or point it at anyone’s eyes. Follow all safety instructions in the manual while using the level.
Avoid staring into the laser beam.
Avoid staring directly into the laser beam on your Johnson GreenBrite laser level or pointing it toward anyone’s eyes. Even brief exposure can be harmful, so position the tool carefully and follow the safety instructions in the product manual.
Check calibration regularly, especially after a drop.
Check the calibration of your Johnson GreenBrite laser level regularly to help ensure accurate measurements, especially after it has been dropped or bumped. A simple verification against a known level or plumb reference can reveal whether the laser needs adjustment. If the readings seem off, follow the manufacturer’s calibration instructions or have the tool serviced before relying on it for important work.
Store the level in its protective case.
Store your Johnson GreenBrite laser level in its protective case when it’s not in use. The case helps shield the tool from dust, moisture, and bumps that could damage its components or affect its accuracy. Before storing it, make sure the level is clean and dry, and pack any accessories securely to help keep everything protected and ready for your next project.
No Responses