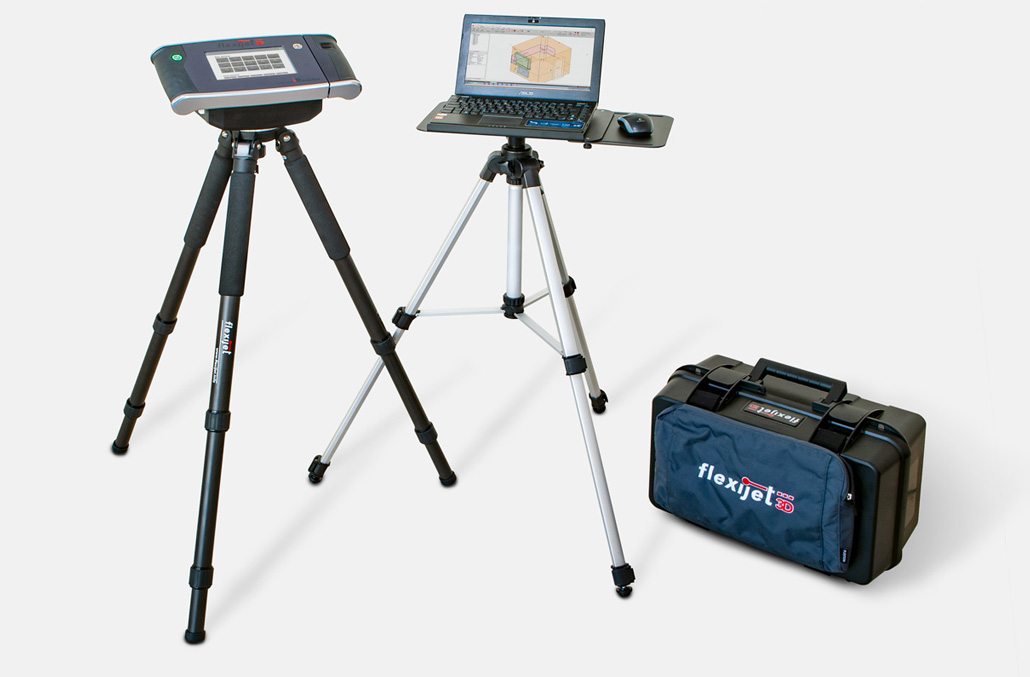
3D Laser Measuring Tools: How They Work and How to Choose One
A 3D laser measuring tool captures the size, shape, and position of objects or spaces using laser light. Depending on the device, it may measure distances and angles, scan a surface into a digital model, or combine measurements with an image of the work area. These tools help professionals document real-world conditions with speed and precision.
What Is a 3D Laser Measuring Tool?
The term “3D laser measuring tool” can refer to several kinds of equipment. A handheld laser distance meter measures individual distances, while a 3D laser scanner collects many measurements across a surface or environment. Some systems also include cameras, digital levels, or software that turns measurements into plans and models.
Most 3D scanners work by sending laser light toward a surface and detecting the reflected signal. The device calculates the distance to points on that surface. By gathering many points, it creates a point cloud—a digital collection of coordinates that represents the scanned object or space. Software can then use the data to create measurements, drawings, or 3D models.
Common Types
- Laser distance meters: Measure point-to-point distances and may calculate area, volume, or indirect measurements. Some models offer basic 3D functions when paired with an app or camera.
- Terrestrial laser scanners: Capture detailed measurements of rooms, buildings, construction sites, and other large spaces, often from a tripod.
- Handheld 3D scanners: Move around an object while capturing its surface. They are often used for product design, inspection, and reverse engineering.
- Mobile mapping systems: Combine laser scanning with cameras and positioning technology to record larger environments, such as roads or facilities.
Where 3D Laser Measurement Is Used
Because laser tools can capture geometry without relying on manual tape measurements alone, they are useful across many fields:
- Construction and renovation: Record existing conditions, check dimensions, and compare completed work with design plans.
- Architecture and surveying: Document buildings, interiors, land features, and infrastructure.
- Manufacturing and quality control: Compare a part’s dimensions with its specifications and identify deviations.
- Product design and reverse engineering: Capture the shape of an existing component to support redesign or modeling.
- Facilities management: Create digital records of rooms, equipment, and building systems.
- Heritage documentation: Record the details of structures, artifacts, and sites for preservation and study.
Benefits of Using a 3D Laser Measuring Tool
A 3D measuring system can collect a large amount of spatial information more quickly than measuring every feature by hand. The resulting digital record can also make it easier to share site conditions with colleagues, clients, or contractors.
Other benefits may include:
- Detailed records: A scan can preserve measurements that might otherwise be missed during a site visit.
- Fewer repeat visits: A complete scan may provide enough information to answer later measurement questions remotely.
- Improved coordination: Digital models and point clouds can help teams identify conflicts and communicate design changes.
- Noncontact measurement: Laser scanning can capture many objects and spaces without physically touching their surfaces.
Results depend on the device, scanning method, environment, and operator. Reflective, transparent, dark, or obstructed surfaces may be difficult to capture, and a scan still needs to be checked against the project’s accuracy requirements.
How to Choose the Right Tool
Start with the type of work the tool needs to perform. A laser distance meter may be appropriate for quick room measurements, while a scanner is better suited to capturing complex geometry or creating a detailed digital record.
- Measurement range: Choose a tool that can reliably cover the distances and object sizes involved.
- Accuracy: Check the manufacturer’s stated accuracy and consider the tolerance required for the application.
- Scan speed and detail: Higher point density can capture finer features, but may require more time and storage.
- Software compatibility: Confirm that files can be exported to the CAD, building information modeling (BIM), inspection, or design software used by the team.
- Portability and setup: Consider weight, battery life, mounting options, and how easily the system can be used on site.
- Environmental conditions: Outdoor light, dust, vibration, and surface properties can affect performance.
- Training and support: Software workflows and scan registration can require experience, so training and technical support may be important.
Best Practices for Accurate Results
Before scanning, plan the route and identify areas that may be hidden from the device. Take overlapping scans from multiple positions when needed, and use reference targets or control points if the workflow calls for them. Keep the equipment stable, follow calibration instructions, and review the data for gaps or alignment problems before leaving the site.
It is also important to understand the difference between a visually convincing model and a verified measurement. For critical work, confirm dimensions using appropriate reference measurements and follow the applicable project standards.
Laser Safety
Laser products are classified according to their potential risk. Read the device’s safety information, use it as directed, and avoid aiming the beam at people or looking directly into the laser aperture. Follow workplace procedures and any required protective measures for the specific equipment.
Conclusion
A 3D laser measuring tool can turn physical spaces and objects into useful digital measurement data. From basic distance checks to detailed point-cloud capture, the right system can support faster documentation, better coordination, and more informed decisions. Selecting a tool that matches the required range, accuracy, workflow, and environment is key to getting dependable results.
9 Essential Tips for Accurate and Safe 3D Laser Measurements
- Keep the lens clean for accurate readings.
- Calibrate the tool as recommended by the manufacturer.
- Set it on a stable tripod or surface.
- Use targets in bright or low-contrast spaces.
- Avoid blocking the laser during a scan.
- Check battery and storage before starting.
- Scan from multiple angles to reduce blind spots.
- Wear laser safety gear when required.
- Save and review measurements before leaving the site.
Keep the lens clean for accurate readings.
Keep the lens clean to help your 3D laser measuring tool deliver accurate, reliable readings. Dust, fingerprints, or smudges can interfere with the laser or sensor, affecting measurement quality and scan detail. Gently wipe the lens with a clean, soft microfiber cloth before use, and follow the manufacturer’s cleaning instructions. Avoid abrasive materials or harsh cleaners, which could scratch or damage the lens.
Calibrate the tool as recommended by the manufacturer.
Calibrate your 3D laser measuring tool according to the manufacturer’s instructions to help ensure reliable, accurate results. Calibration checks that the device is measuring correctly and can reveal issues caused by frequent use, transportation, or changes in temperature. Follow the recommended schedule and procedure, and avoid relying on critical measurements if the tool is overdue for calibration or shows signs of damage.
Set it on a stable tripod or surface.
Set your 3D laser measuring tool on a stable tripod or level surface before taking measurements. A secure setup helps prevent movement and vibration that can lead to inaccurate readings or misaligned scans. Make sure the device is firmly mounted, positioned where it has a clear view of the area, and left undisturbed while it measures.
Use targets in bright or low-contrast spaces.
In bright or low-contrast spaces, use scanner targets to help the 3D laser measuring tool identify and align scan positions accurately. Place targets throughout the area where they’re visible from multiple scanning positions, and avoid clustering them together. This gives the software clear reference points for registering scans, reducing alignment errors and helping create a more complete, reliable 3D model.
Avoid blocking the laser during a scan.
Avoid blocking the laser during a scan to help the 3D measuring tool capture complete, accurate data. Keep people, equipment, and other objects out of the scanner’s line of sight, and reposition the device when needed to reach hidden areas. If part of the target is obstructed, the scan may contain gaps or incomplete measurements, so check the captured data before moving on.
Check battery and storage before starting.
Before starting a 3D laser measurement, check that the device’s battery is fully charged or has enough power for the entire job. Also confirm that there’s sufficient storage space for new scans and measurement files. A quick check can help prevent interruptions, lost data, or the need to repeat work.
Scan from multiple angles to reduce blind spots.
Scan your subject from multiple angles to reduce blind spots and capture a more complete 3D model. A single scan position may miss surfaces hidden behind corners, equipment, or other features. Move around the object or space, keeping enough overlap between scans so the software can align them accurately. Before finishing, review the scan for gaps and capture any areas that are still missing.
Wear laser safety gear when required.
Wear laser safety gear whenever the tool’s instructions, laser classification, or workplace procedures require it. Depending on the device and task, this may include protective eyewear designed for the laser’s specific wavelength and power. Follow the manufacturer’s guidance, never look directly into the beam or aim it at anyone, and remember that ordinary sunglasses are not a substitute for laser safety glasses.
Save and review measurements before leaving the site.
Save your measurements and review them before leaving the site. Confirm that the files are stored correctly, check for missing areas or unexpected gaps, and verify key dimensions against your notes or reference points. Catching problems while you’re still on location can save time and prevent costly return visits.
No Responses